Pages

Tuesday 22 April 2014

Sadaharu Aoki's caramel tart


First of all, I'll have to admit that I've never tried anything from Sadaharu Aoki so I can't compare the original but from what I made, this has got to be one of the tastiest chocolate caramel tart I've had. Now, if you don't know me well, I have this thing for chocolate, caramel and biscuits. I've made a simillar tart once before, click here see my other chocolate caramel tart creation. Compared to that, this tart by Mr Aoki is heaps better. Maybe it's the fact that he used milk chocolate instead of dark. Maybe it's the use of a mousse instead of a ganache which makes the tart taste so much lighter on the palate. Maybe it's the addition of glucose to make the caramel all nice and gooey. And with only 3 components, it's a breeze to make.


Compared to Aoki's masterpiece, mine looks like crap. Literally. I reckon my large pipping tip was the reason why it resembles dog poo. Poopers. It took me a few attempts to get the swirl right so I suggest you practice on one tart first before pipping the rest. Start from the outer circumference and swirl your way into the centre. Don't forget a final dusting of some dutched cocoa powder to complete the look.


Tarte au caramel by Sadaharu Aoki. Recipe from Marie Claire
Serves 4

Ingredients 

Sweet pastry 
100g butter
60g icing sugar
20g ground almonds
1 egg yolk
2 g salt
170 g flour

Caramel
70 g sugar
70 g glucose
70 g cream
30 g salted butter
2 vanilla

Chocolate mousse 
60 g cream
110 g milk chocolate
90 g whipped cream

Instructions

Make the caramel by boiling cream, vanilla and butter, then add the glucose . In a separate pot, cook the sugar to 170 ° C before pouring in the cream mixture.

Make the dough by mixing in order: butter, almond powder, icing sugar, salt, eggs and flour without overworking the mixture. Refrigerate in film. Line a mold of 20 cm in diameter with the dough. Garnish with parchment paper and dried beans. Bake at 160 ° C. Remove the paper and beans. Garnish with salted caramel. Smooth.

Make the chocolate mousse by pouring the boiled cream over the crushed chocolate. Mix. Fold in whipped cream. Allow 3 H in the refrigerator.

Thursday 21 November 2013

Tooth cupcake


Last week marked the end of 3rd year as a dental student. Three years of dentistry passes by so quickly. I still remembered my first day in clinic. How excited we all were in our brand new clinic coats. Feeling like a dentist, looking into our each others mouth with a hand mirror. Being very careful not to use the tip of the explorer when running it against the tooth. When infection control was drilled into us every single session. Practicing our finger rests, our patient-operator positioning. Where the most invasive thing we did was probing each other's gums. Ouch!


1st year was the year when we had to master tooth morphology. In the beginning, every tooth looked similar and it felt like an impossible task to name a tooth just by looking at it. It took many hours of practice, but eventually I was able to differentiate all 32 teeth. My favourite tooth? The 47 with the "hot cross bun" grooves/fissures that's instantly recognisable to any dental student.   

Now here I am, past the halfway mark. It's been a fun year and I've thoroughly enjoyed the experience. Spending 3hrs, twice a week in clinic. Seeing 24 different patients, each and every one with a different treatment plan. Doing my very best for each patient. Hoping that my fillings would last them for many years. Smiling from ear to ear under the mask when they comment what a good job you did. Being grateful for your life when you listen to their life stories. Trying oh so hard to empathise with them. It can get stressful at times, but I'm really lucky to have such great tutors to guide me. 


I have to admit that I did not come up with the idea of a tooth cupcake. I have to give credit to Erica's Sweet Tooth for the inspiration. Her idea is ingenious but I decided I could take it up a notch. Not only does it look like a tooth from the outside, it looks like one on the inside as well. Enamel, dentine, pulp. I've got it all covered. And why not add some amalgam filling as well. All you need is a spoon excavator to eat it with and you'll have the complete dental experience! Digging pass the tough enamel-fondant before reaching the dentine-vanilla layer and finally exposing the pulp-red velvet as you eat your way into the centre of the cupcake.


Tooth Cupcake
Adapted from Erica's Sweet Tooth & Hummingbird Bakery. Do take a look at Erica's site for detailed instructions on how to make the tooth cupcake

Ingredients

Red Velvet Cake
60g unsalted butter at room temperature
150g caster sugar
1 egg
20g cocoa powder
40ml red food colouring
½ tsp vanilla extract
120ml buttermilk
150g plain flour
½ tsp bicarbonate of soda
1½ tsp white vinegar
 
Vanilla Cake
105g plain flour
125g caster sugar
½ tbsp baking powder
A pinch of salt
35g unsalted butter, at room temperature
105ml whole milk
1 egg
¼ tsp vanilla extract

Cream cheese frosting
300g icing sugar, sifted
50g unsalted butter, at room temperature
125g cream cheese, cold

Instructions

Red Velvet Cake
Put the butter and the sugar in a freestanding electric mixer with a paddle attachment (or use a handheld electric whisk) and beat on medium speed until light and fluffy and well mixed. Turn the mixer up to high speed, slowly add the egg and beat until everything is well incorporated

In a separate bowl, mix together the cocoa powder, red food colouring and vanilla extract to make a very thick, dark paste. Add to the butter mixture and mix thoroughly until evenly combined and coloured (scrape any unmixed ingredients from the side of the bowl with a rubber spatula). Turn the mixer down to slow speed and slowly pour in half the buttermilk.

Beat until well mixed, then add half the flour and beat until everything is well incorporated. Repeat this process until all the buttermilk and flour have been added. Scrape down the side of the bowl again. Turn the mixer up to high speed and beat until you have a smooth, even mixture. Turn the mixer down to low speed and add the bicarbonate of soda and vinegar. Beat until well mixed, then turn up the speed again and beat for a couple more minutes.
Spoon the mixture into the paper cases until two-thirds full and bake in the preheated 170 degree celsius oven for 20 to 25 minutes, or until the sponge bounces back when touched. A skewer inserted in the centre should come out clean. Leave the cupcakes to cool slightly in the tray before turning out onto a wire cooling rack to cool completely.

Vanilla Cake
Put the flour, sugar, baking powder, salt and butter in a free-standing electric mixer with a paddle attachment (or use a hand-held electric whisk) and beat on slow speed until you get a sandy consistency and everything is combined.

Gradually pour in half the milk and beat until the milk is just incorporated.
Whisk the egg, vanilla extract and remaining milk together in a separate bowl for a few seconds, then pour into the flour mixture and continue beating until just incorporated (scrape any unmixed ingredients from the side of the bowl with a rubber spatula). Continue mixing for a couple more minutes until the mixture is smooth. Do not overmix.

Spoon the mixture into the paper cases until two-thirds full and bake in the preheated oven for 20–25 minutes, or until light golden and the sponge bounces back when touched.

Cream Cheese Frosting
Make the frosting by beating the icing sugar the remaining 20g of the unsalted butter together in a freestanding electric mixer with a paddle attachment (or use a handheld electric whisk) on medium-slow speed until the mixture comes together and is well mixed. Add the cream cheese in one go and beat it until it is completely incorporated. Turn the mixer up to medium-high speed. Continue beating until the frosting is light and fluffy, at least five minutes. Do not overbeat, as it can quickly become runny.

Assembling the tooth cupcake
Bake cupcakes and allow to cool completely.

For the cake ball mixture for the cusps, crumble up Vanilla cake and mix with a few tablespoons of frosting, until the consistency is malleable but not too wet.
Apply a thin coat of frosting to the tops of the red velvet cupcakes and start forming cusps out of the cake ball mixture using an offset spatula.

Refrigerate cupcakes 30 minutes to an hour to allow cake ball mixture to stabilize

Roll out fondant to 1/4″ thickness, using powdered sugar to prevent sticking.
Cut out circles slightly larger than the diameter of the cupcakes and drape over cusps.
Use a sharp knife to trim the edges and tuck the edges in with your fingers and an offset spatula.


I made these cupcakes for a classmate of mine who had a fairy-themed 21st. And yes, I was a tooth fairy that night. 

Tuesday 5 February 2013

Nutella Tart

Happy Nutella Day!

I have to say that Nutella has got to be the tastiest, awesomest thing you can spread on a slice of bread. Not only is it good on bread, I spread Nutella on bananas, add it to a cup of hot chocolate and best of all, straight from the jar with a spoon. I have fond childhood memories of spending my pocket money  on small packs of Nutella and using the plastic stick provided to scoop out all that deliciousness. 

This tart by Pierre Herme doesn't scream NUTELLA but nonetheless it's still a pretty damn good tart. The Nutella is sandwiched between a sweet tart pastry base and a chocolaty ganache-like layer, dotted with toasted hazelnuts. It's really easy to make if you've prepared the base beforehand. If you ain't too keen on making the tart base, you can always get ready made ones from the supermarket and just follow the recipe below. For those who want the full Pierre Herme experience, I have provided a link to his sweet tart dough recipe as well. 

For the sweet tart pastry recipe, click here!

Pierre Herme's Nutella Tart from Chocolate Desserts by Pierre Herme
Makes 1 9-inch tart

Ingredients

200 g Nutella
140 g bittersweet chocolate (Herme' uses Valhorna Noir Gastronomie)
200 g butter
1 large egg, room temperature, stirred with a fork
3 large egg yolks, room temperature, stirred with a fork
2 Tbsp sugar
140 g Hazelnuts

Instructions

Toast the hazelnuts 10 minutes in a 180C hot oven. Remove as much skin as possible by rubbing the hazelnuts inside a kitchen towel. Chop coarsely.

Heat oven to 190C

Melt chocolate and butter separately. Allow to cool till 40C

Spread the Nutella at the bottom of the tart shell

Mix the egg into the (cooled down) chocolate. Do this gently to avoid incorporating air. Add yolks, little by little, then the sugar. Finally, fold in the melted butter, always stirring gently. This will take a little time. Pour on top of the Nutella and sprinkle with the toasted hazelnuts.

Bake for about 11 minutes. The sides of the filling should be set but the middle still slightly wobbly if shaken.


How do you pronounce Nutella? New-tella or Nut-tella?

Sunday 11 November 2012

Mars oatmeal bar

It's finally over.. 2nd year that is. Only 3 more years till I become a dentist! 2nd year has passed by so darrn quickly. It's probably got to do with all those night labs and clinic, finishing classes at 8.30pm. But hey, I've started honing my skills on restoring dummy patient's teeth, treated my first "real patient" and I've learnt so much on head and neck anatomy. It's a pity I'll never get the chance to dissect a cadaver's head again. 

Now I made this wayyyy back in September last year. It was for a picnic during the mid semester break and frankly it was when our friendship really started. I still remember being rather surprised that you actually agreed to join us and frankly, those chocolate/peanut butter cupcakes you made were pretty good. But then again these were gobbled up the moment I took them out. Crunchy, gooey, chocolatey. They were really delicious. Perfect for a picnic or a midday snack.

You can pretty much use any chocolate bar, Snickers or Milky Way will work just fine. And you won't miss much if you opt not to add in the chocolate chips like I did. They were a breeze to make and surprisingly, egg-less. Now, as a dental student, I'll have to point out that even though the recipe requires only 5 tablespoon of sugar, lets not forget the hidden sugar from the Mars bars :)


Mars oatmeal bar adapted from Martha Stewart by pepsakoy
Makes 12 medium sized bars

Ingredients
3 Mars bars
1/4 cup whipping cream
1 cup old-fashioned rolled oats
1 cup all-purpose flour
5 tbsp light brown sugar
1/2 scant teaspoon baking soda
1/2 teaspoon salt
142 g unsalted butter, cut into small pieces
1/2 cup semisweet chocolate chips

Instructions

Preheat oven to 180 degrees. Coat a 8-by-8- inch baking pan with cooking spray. Line with a sheet of parchment paper, leaving a 2-inch overhang on each short side. Put Mars bars and cream in a small saucepan; cook over medium heat, stirring occasionally, until the bars are melted, about 5 minutes. Let cool.

Stir together oats, flour, brown sugar, baking soda, and the salt in a large bowl. Blend in butter with a fork or your fingertips until mixture resembles coarse meal; press half of mixture onto bottom of lined pan. Bake until just set and starting to color around edges, about 20 minutes. Let cool in pan on a wire rack 5 minutes.

Sprinkle crust with chocolate chips; drizzle with melted Mars mixture. Top with remaining crumb mixture. Bake until pale golden, 20 to 25 minutes. Let cool completely in pan before cutting into squares

Seeing where we are now, I wished I never told you.

Tuesday 18 September 2012

Top Chef: Just Dessert

Now this has got to be one of my favourite shows of all time. If you haven't heard of the Top Chef series, it's a reality based cooking competition for professional chefs and Top Chef: Just Dessert is a spin-off featuring pastry chefs. Watching the show never fails to make me hungry.

This cake was part of the finale in the 2nd season of the show. The final challenge was to create a display case that includes a display piece, an entremet cake, a savory bread piece, bonbons and a plated dessert for a special person in the chef's life. In case you're wondering, an entremet is just a fancy term for a multi-layered mousse cake. This entremet was created by Sally Camacho. She's one of my favourites and  I was really glad that she made it to the finals. With no name to this cake, it's simply called: 
Entremet- Chocolate Mousse, Mango Vanilla Cream, Caramel Crémeux, Lime, Almond Sponge

 This entremet has 7 components in total and if you followed the original recipe it would have 11 layers. I'll have to confess that what I've made is nothing compared to Sally's original creation. I've skipped a few components and layers just out of pure laziness. Sooo... check this out to see how awesome it'll be if you've followed her every step. Her recipe might be a tad technical so if you're a beginner, I suggest you save this recipe and try it again when you've got a barrage of baking techniques up your sleeves. 

I'll have to add that the almond sponge tasted rather weird? But maybe it's just because my oven died on me just when I was about to put the sponge in. I had to bake it in a toaster oven instead which isn't very ideal. It's also the first time I've tried out this technique of baking a sponge: making a paste first and folding it into the meringue. 

The mango vanilla cream wasn't mango-y enough for my taste so I doubled the amount of mango. And if you haven't realised, this cake uses heaps of cream. So if you're on a diet, you might want to skip this. :)


Entremet- Chocolate Mousse, Mango Vanilla Cream, Caramel Crémeux, Lime, Almond Sponge 

Ingredients

Lime Jam:
200 grams water
10 limes, juiced and zested
100 grams sugar
1 grams salt
1/2 vanilla bean
8 grams apple pectin

Mango Vanilla Cream:
100 grams mango puree (you might want to double this)
75 grams inverted sugar
4 vanilla beans
100 grams egg yolks
6 grams gelatin, bloomed
300 grams heavy cream, whipped to soft peaks

Caramel Cremeux:
3 vanilla beans
450 grams heavy cream
100 grams sugar
100 grams yolks
6 grams gelatin
1.25 grams Sel Gris

Chocolate Mousse:
115 grams sugar
368 grams heavy cream, scalding + 800 grams heavy cream, soft whip
80 grams yolks
256 grams Manjari chocolate
8 grams gelatin, bloomed 
 
Caramel Glaze:
500 grams sugar
450 grams cream
450 grams water
20 g rams cornstarch
22 grams gelatin, bloomed

Almond Sponge:
100 grams almond flour
85 grams powdered sugar
50 grams cake flour
60 grams egg whites + 160 grams
20 grams heavy cream
100 grams sugar
4 grams Fleur de sel

Almond Petite Beurre:
200 grams pastry flour
100 grams powdered sugar
150 grams almonds
135 grams butter
3 grams sea salt

Instructions

Lime Jam:
Place all ingredients in a small saucepan and cook over low heat, stir to prevent burning. Allow to boil and cook for 1 minute. Take off heat and allow to cool.

Mango Vanilla Cream:
In a small saucepan, place mango puree, inverted sugar, and vanilla beans. Cook over low-medium heat. Temper in yolks, cook over low heat to make anglaise. Cook to 85 degrees Celsius. Take off heat, add gelatin. Remove vanilla beans.

Blend to smooth. Chill to 40 degrees Celsius. Fold in soft cream. Pour mixture into insert fleximolds. Freeze

Caramel Cremeux
In a small saucepan, place scraped vanilla beans and cream. Bring to scald. Reserve and keep warm.

In a medium saucepan, make a dry caramel by adding 1 tablespoon of sugar at a time to the hot pot to caramelize. Bring to dark caramel. Break caramel by adding warm cream to caramel. Cook over low heat to dissolve caramel. Temper in egg yolks. Cook over low heat to make anglaise. Cook to 85 degrees Celsius.

Take off heat, add gelatin and Sel. Remove vanilla beans. Blend to smooth. Pour into insert fleximolds. Place frozen disk of mango cream right on top to kiss cremeux. Freeze

Chocolate Mousse:
In a small pot, keep heavy cream warm. In a medium pot.

Make a dry caramel with the sugar. Once caramel is dark, break with hot cream. Temper in yolks to make anglaise. Cook to 85 degrees Celsius. Pour over chocolate and gelatin. Blend to smooth. Cool chocolate mixture to 40 degrees Celsius. Fold in soft cream. Place in piping bag for assembly.

Caramel Glaze:
In a small pot, bring cream to scald and reserve warm.

In a medium pot make a dry caramel with the sugar. Once caramel is dark, break with hot cream. Cook on low heat to dissolve caramel.

Mix water and cornstarch to create slurry. Add to caramel. Bring mixture to a boil. Allow to boil for 30 seconds. Remove from heat. Add bloomed gelatin. Burmix to smooth. Ice bath to chill glaze to 60 degrees Fahrenheit. Reserve to glaze entremet.

Almond Sponge:
In a Robot Coupe, combine almond flour, powdered sugar, cake flour, 60 grams of egg whites, and heavy cream. Robot to make a paste.

In a kitchen aide mixer, with the whip attachment, mix 160 grams of egg whites on medium. Slowly add the sugar to make a medium peak meringue. Fold meringue into paste. Spread onto a silpat lined sheet tray and bake in a pre heated 375 degree Fahrenheit oven for 8-10 minutes or until evenly browned. Allow to cool. Then cut 2-7 inch circles and spread one side with lime jam and sprinkle with Fleur de sel.

Almond Petite Beurre:
Place all ingredients in Robot Coupe. Blend to form dough. Press into 7 3/4- inch ring. Remove ring. Bake in preheated 325 degree Fahrenheit oven for 15-18 minutes or until evenly golden brown.

Assembly:
Build upside down. Place acetate on a flat sheet tray. Place 8-inch stainless steal ring on sheet tray. Pipe chocolate mousse all over bottom first. Use a spatula to spread it evenly and up the sides of the ring. 

Next press frozen insert of mango cream and caramel cremeux into mousse. Press an almond sponge circle jam side down onto frozen insert. Top with more chocolate mousse and spread mousse to cover evenly. 

Then repeat with another frozen insert of mango cream and caramel cremeux into mousse and press an almond sponge circle jam side down onto frozen insert again. Top with more chocolate mousse to cover. 

Then top with almond petite beurre. Freeze entremet in blast freezer. Once totally frozen. Torch outer part of the ring and remove ring from entremet. Glaze entremet immediately with caramel glaze. Garnish sides of entremet with tempered manjari plaques.


Pssst: If you notice in the 1st and 2nd picture, the layers are in a different order. And that's because I was stupid enough to not notice which way is the right side up when pouring the glaze over. 

Monday 4 June 2012

My macaron journey


I've been holding back the idea of blogging about my macaron adventures for the longest time. I hesitated writing this because somehow I felt that there's no end to this journey. That there's still so much more to explore and do. I finally made up my mind just because I want to share my mac photos with the rest of the world. 

It all started way back in 2007 when I was still in high school. Back then, macarons were only starting to be popular and not many knew how to make these expensive gems. I still remember my first attempt. It was.. one gigantic mess. To think I actually spent hours researching on how to make the perfect macaron; I noted down every tip and tricks I found on the net and followed every one of them to the t. In the end, my batter was way too runny and it turned out nothing like a macaron. My 2nd attempt was much more successful. I still remember staring into the oven for the entire 20 min watching my macarons rise and develop feets and then going crazy in the kitchen.
My 2nd attempt
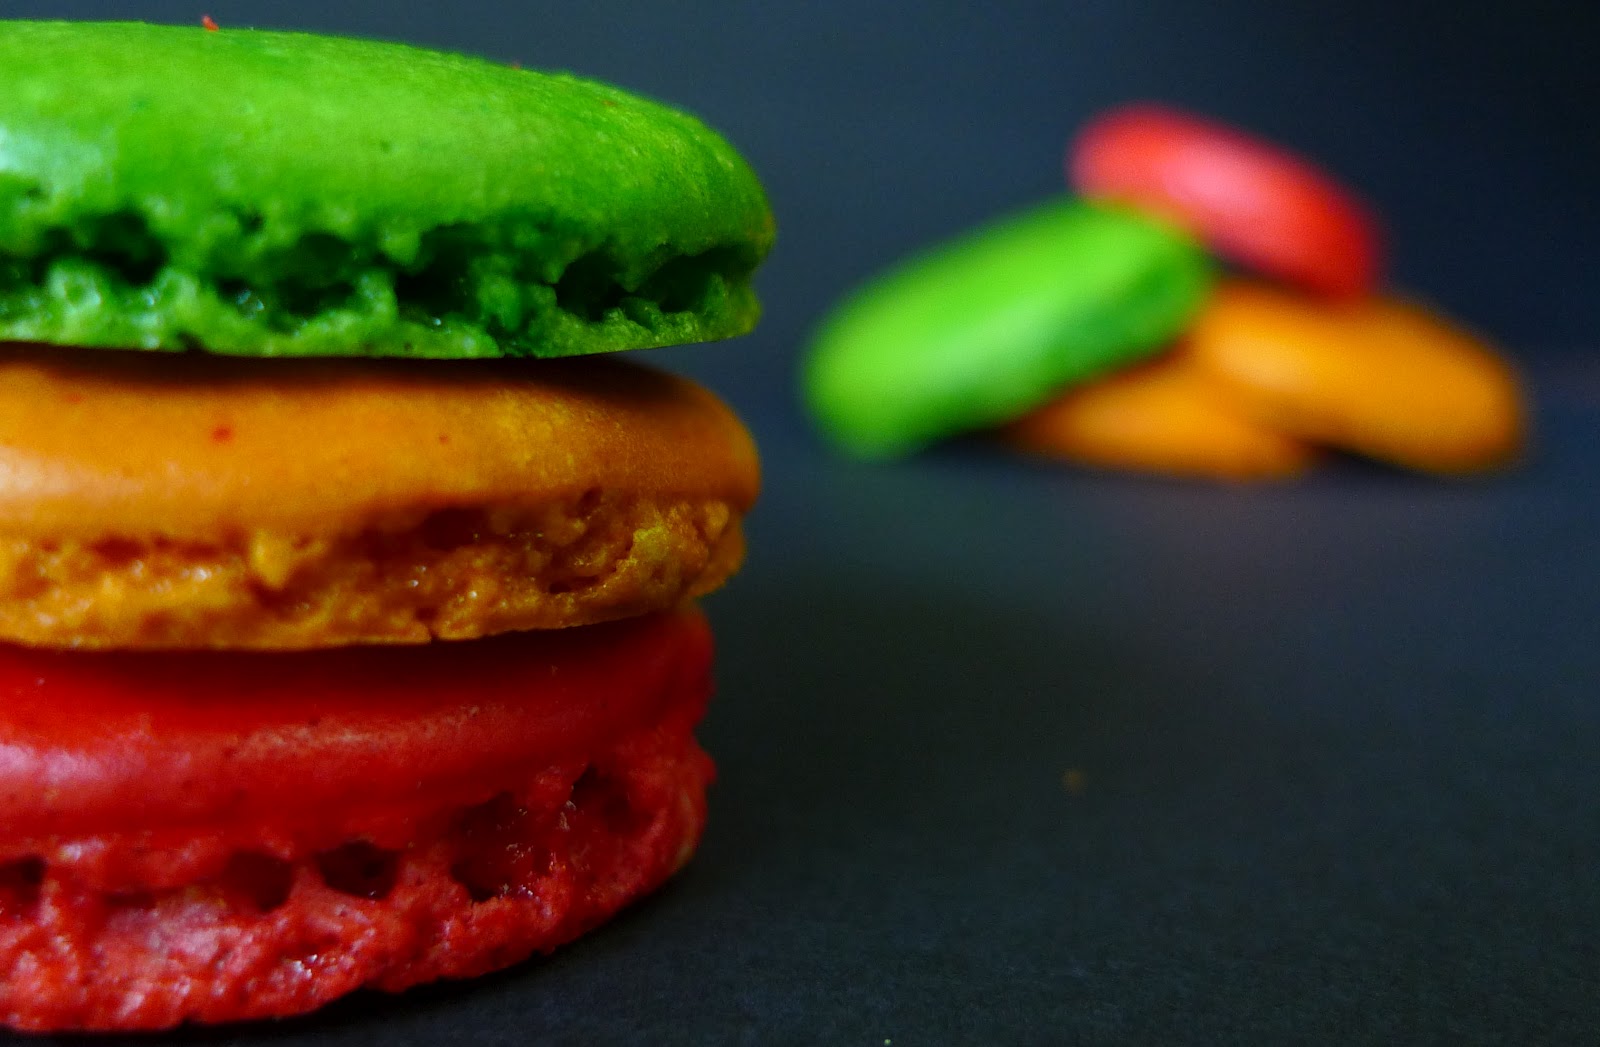
My 3rd,4th,5th,6th,7th and 8th attempt all done in 2 days.

After my successful 2nd attempt, I decided to challenge myself and make 18 macarons with 6 different fillings for a friend's 18th. And boy was it a challenge. Every batch came out different and it was then that I understood why macs were such a temperamental bunch. No matter how hard I tried to follow the recipe, every batch was different. Some had feet and while others didn't. It was also my first time making a buttercream filling and it was an omg moment when I realised just how much butter went into the pistachio buttercream. It was after making 6 batches consecutively that I finally got the hang of macaronage (the art of making macarons)
Chocolate
So what makes a perfect macaron? In my opinion, there are 4 things to look out for:
1. Appearance wise - nice and round with a prominent feet
2. Crisp outer layer
3. Chewy centre
4. Tasty filling

I'm not one who likes spending 3 bucks on a macaron but when I do, I usually am disappointed. There hasn't been many places I've tried where their macs fulfilled all my criteria. Most of them lack the chewiness and some of them so soft, I'm sure it was at least a week old. I know that macarons taste heaps better after letting it age in the fridge for a day or two. But when it starts going mushy, you know that it's way pass its prime.
Hamburger macs
There are now a gazillion posts about macarons all over the food blogging community and so I shall just summarise the steps that I follow. Do note that I'm using the French method and it works perfectly on all occasion. I've never tried the Italian method just because it's so much more troublesome. The recipe below is one that I've used countless of times and have memorised it by heart. It hasn't failed me yet. 

- Blend your almond and icing sugar together in a food processor so that you don't have to sift them (Sifting's a bitch. When I first started, half the time was spent on sifting the almond meal) 

- Age your egg whites (1-2 days at least. If you've forgotten, microwave in 5-8 sec bursts)

- The meringue should be stiff such that if you flip the bowl over, it stays put.

- When it comes to folding the dry ingredient into the meringue, do not be afraid. You do not have to be gentle for the first few strokes. 

- Stop folding once you reach the ribbon stage (To check, lift your spatula and the batter should fall in a steady stream forming folds once it hits the bowl) -> This is the most important step 

- Allow the macaron to form a skin after piping. It'll be ready if it doesn't stick to your finger when you touch it. 

- Baking time differs for different ovens. This is the most tricky part I've yet to master. But what you want is a convection oven (fan) and a high temp at the beginning so that the feet will form. Once the feets are formed you might want to lower the temp so that the top doesn't get burnt. However, too low a temperature and you'll risk having that air bubble in the shell. So what's the magic number? I'm not too sure myself. For my oven at home, after much trial and errors, I've come up with 160C for 5min and 140C for 10-15min. 
Ispahan

Macaron shells by Tartelette
(Makes 20-25 macs)

Ingredients 
90 gr egg whites (use eggs whites that have been preferably left 3-5 days in the fridge)
25 gr granulated sugar
200 gr powdered sugar
110 gr almonds (slivered, blanched, sliced, whatever you like)

Instructions

In a stand mixer fitted with the whisk attachment, whip the egg whites to a foam, (think bubble bath foam) gradually add the sugar until you obtain a glossy meringue (think shaving cream). Do not overbeat your meringue or it will be too dry.

Place the powdered sugar and almonds in a food processor and give them a good pulse until the nuts are finely ground. 

Add them to the meringue, give it a quick fold to break some of the air and then fold the mass carefully until you obtain a batter that falls back on itself after counting to 10. Give quick strokes at first to break the mass and slow down. 

The whole process should not take more than 50 strokes. Test a small amount on a plate: if the tops flattens on its own you are good to go. If there is a small beak, give the batter a couple of turns.

Fill a pastry bag fitted with a plain tip (Ateco #807 or #809) with the batter and pipe small rounds (1.5 inches in diameter) onto parchment paper or silicone mats lined baking sheets. 

Let the macarons sit out for 30 minutes to an hour to harden their shells a bit. In the meantime, preheat the oven to 140C.

When ready, bake for 15 to 20 minutes, depending on their size. Let cool. If you have trouble removing the shells, pour a couple of drops of water under the parchment paper while the sheet is still a bit warm and the macarons will lift up more easily do to the moisture. 

Don't let them sit there in it too long or they will become soggy. Once baked and if you are not using them right away, store them in an airtight container out of the fridge for a couple of days or in the freezer. 
Salted Caramel

Wednesday 25 April 2012

Cereal Milk Panna Cotta


I usually only have cereals for breakfast on weekends. And rarely do I have it with milk. I'll either have it dry or I'll sub the milk with Milo. My dislike for milk started the moment I stopped drinking it from a baby bottle. I was about 6 when I finally realised I was too old to be drinking from a bottle. Somehow writing this made me remember how I hated it when my mum didn't mix the milk powder properly and it gets stuck at the teat. And how I love that gurgling sound you get when you stop sucking from the bottle. HAhaha. I have never once drank a glass of milk my entire life. Alright.. enough about me and back to the dessert. 

A friend who tried this said it tasted like the leftover milk after having a bowl of cereal. And I didn't even tell her what it was. I have to say I really enjoyed it. The creamy panna cotta and the crunchy caramelised cornflakes go so well together. If you can't find gelatin sheets, you may use powdered gelatin. However the conversion measurement of gelatin sheet to powder is debatable and after much research, I've come to the conclusion that 1 sheet of gelatin = 2 teaspoon of powdered gelatin. BUT, this depends on what you are making and the strength of the gelatin powder. If you’re making a gelatin dessert that needs to be unmolded, it is wise to use slightly more gelatin just to be sure that it will hold up. 

The original recipe, calls for an avocado purée to be served with it. But it sounded pretty weird to me and I was too lazy to make it so I just used some strawberry and rhubarb jam I got from the farmer's market. This is the 2nd Momofuku recipe (the first being the shortcake) I've tried and so far they've been both very successful. I can't wait to get my hands on the Momofuku Milk bar cookbook.

This is cereally good. Believe me. 


Cereal Milk Panna Cotta from David Chang's Momofuku 

Ingredients

Cereal milk custard
265g cornflakes
710g whole milk
470g heavy cream
30g packed light brown sugar
2 teaspoon sea salt
2 sheets gelatine

Caramelised Cornflakes
60g cornflakes
3 tablespoons nonfat milk powder
1 tablespoon sugar
1/2 teaspoon sea salt
3 1/2 tablespoons unsalted butter, melted.

Instructions

For the panna cotta:
Heat oven to 150 degrees.
Spread cereal on a baking sheet and bake until toasty, about 12 minutes. While still warm, transfer to large bowl or container and add milk and cream. Stir to combine and let steep for 40 - 45 minutes. (The finished custard will get too starchy if it steeps longer.)

Strain into a bowl, pressing on the cornflakes with the back of a rubber splatula to extract as much liquid as possible. (Discard soggy cereal or eat it.) Add the salt and brown sugar to the milk, and heat it in the microwave for 1 minute just until milk is hot enough to dissolve sugar, watching carefully. Stir gently to dissolve sugar. (You can lightly warm the milk on the hob instead of doing it in the microwave, but if you do, do not whisk or overly aerate or over-heat it.)

Bloom (soften) the gelatine in 450m1 cold water. After 2 to 3 minutes when it’s supple and no longer crisp, with a texture Tosi calls “like a jellyfish” remove it from the water, wring it out and add it to the cereal milk. Stir it once or twice to melt the gelatine in the milk.

Divide mixture among 8 ramekins or silicone molds. Refrigerate until set, about 30minutes. If using ramekins, cover and reserve until ready to serve. If using molds, freeze 1 hour and pop out onto silicon liner (not parchment paper as it will stick to the custard), then refrigerate until ready to serve.

For the caramelised cornflakes:
Heat oven to 140 degrees. Put the cereal in a large bowl and crush lightly with your hands. Seven or eight squeezes should be sufficient; you want ccrumbles not powder.

In a small bowl, stir together milk powder, sugar and salt. Sprinkle mixture over crushed cornflakes and add melted butter. Toss to coat cereal evenly. Spread on a baking sheet lined with parchment paper (or a nonstick baking mat) and bake for 20 minutes, or until deep golden brown. Remove from pan and set aside to cool. Serve immediately or store in an airtight container up to 1 week.